Installation in e-conomic
We created a free module for e-conomic, making it easy for you to let your customers pay their invoices online.
e-conomic is an accounting system used for creating and sending invoices.
When you've integrated ePay's module with e-conomic, you can send your customers a link which opens ePay's payment window.
It's easy to get started accepting online payments through e-conomic – you don't have to download or install any files. Follow the 4 simple steps below, and you're good to go.
1. Create an ePay account
You need a test account to try the module. It's free to sign up, and it only takes a few minutes. Once your account is created, you'll receive a unique test merchant number for testing.
Please state that you want a test account in the comment field in step 2. You can disregard prices etc.
When you've tested the module and are ready to accept real payments, simply tell us you're ready and we'll upgrade your test account to a production account. Doing it this way means you don't have to create a new ePay account.
2. How it works
Invoices sent from e-conomic contain a unique link. When the customer clicks on the link, ePay's payment window opens, and the customer can pay the invoice.
3. Configuration in ePay
Log in to your ePay administration here.
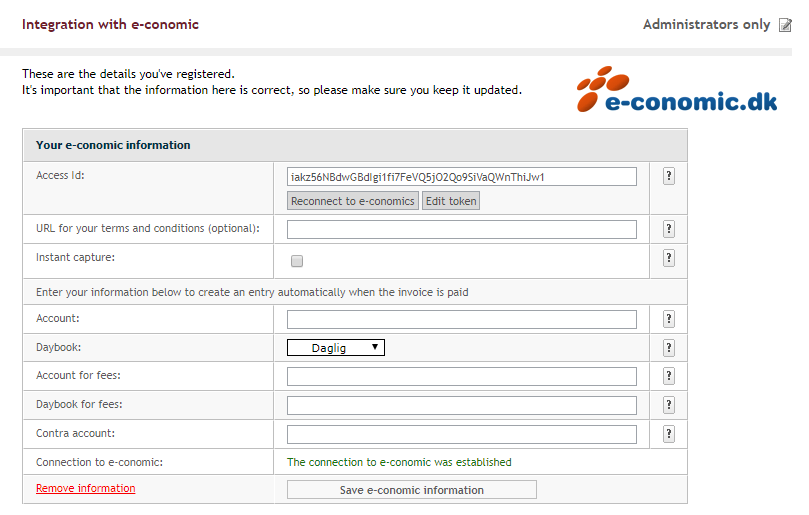
Choose Settings -> e-conomic integration in the left menu.
3.1. Connect to e-conomic
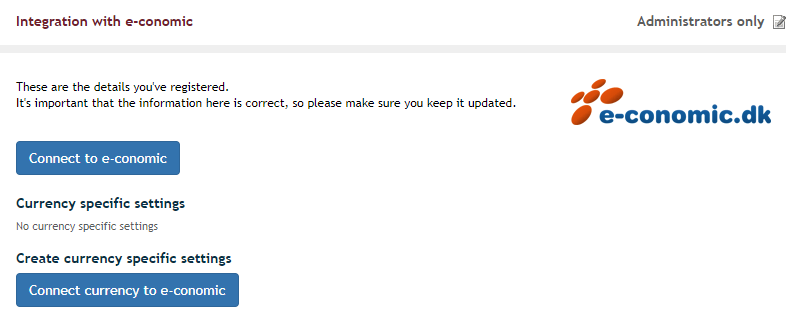
Click on Connect to e-conomic to connect to your e-conomic account
You will then get redirected to e-conomic's site where you have to click on Add App (If you are not logged on to e-conomic then you will have to do this first)
Afterwards you will get redirected back to the ePay administration where you will have to fill out the remaining fields and finally click on Save e-conomic information to save your integration.
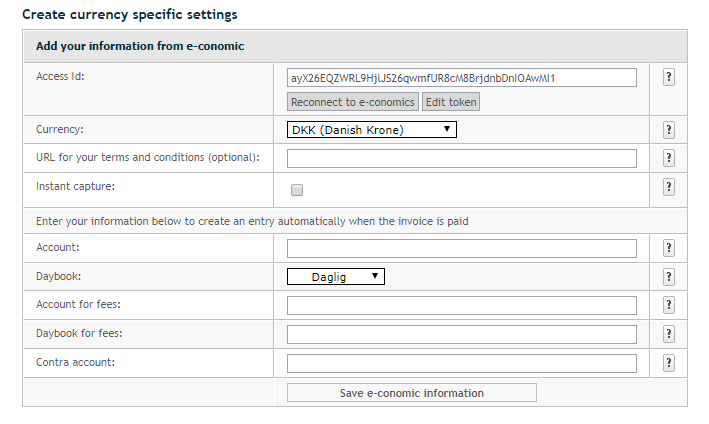
3.2. Connect currency to e-conomic
Click on "Connect currency to e-conomic" to connect to your e-conomic account

You will then get redirected to e-conomic's site where you have to click on Add App (If you are not logged on to e-conomic then you will have to do this first)
Afterwards you will get redirected back to the ePay administration where you will have to fill out the remaining fields and finally click on Save e-conomic information to save your integration.
4. Configuration in e-conomic
Activate API from your e-conomic account.
Log in to your e-conomic account, and press Settings -> All settings in the top right corner. Click on Subscription in the bottom of the left menu, and choose Add-on modules.
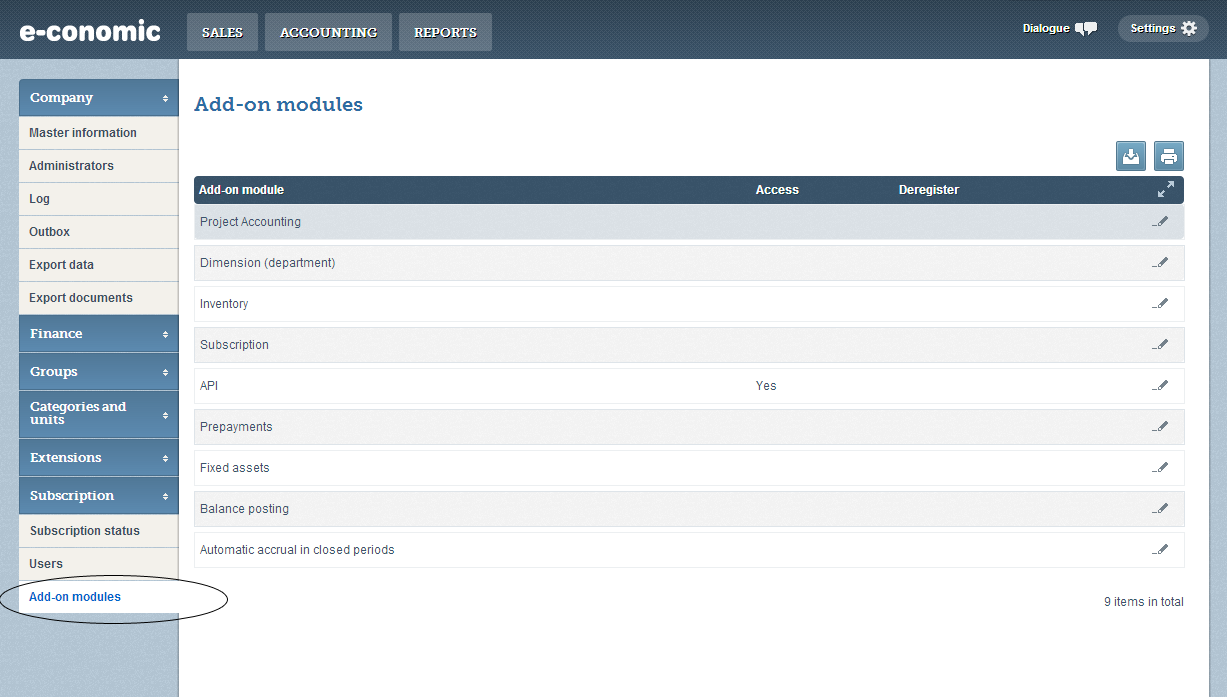
Click on the pencil by API, check Access and press Save.
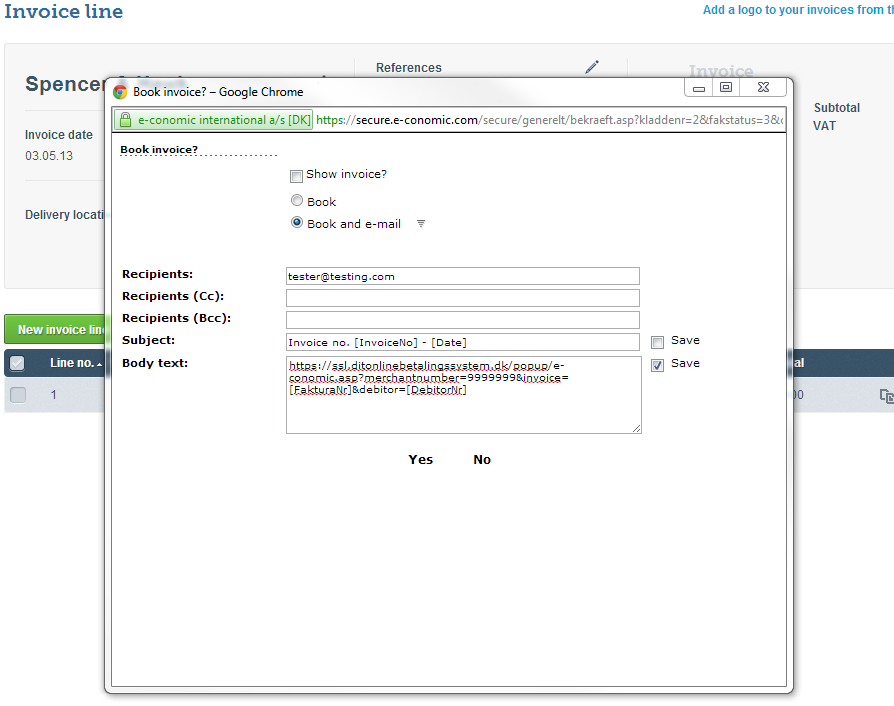
The next time you book an invoice, insert this link in the body text: https://ssl.ditonlinebetalingssystem.dk/integration/economic/pay.aspx?merchantnumber=[MERCHANTNUMBER]&invoice=[FakturaNr]&debtor=[DebitorNr]
You need to replace [MERCHANTNUMBER] with your own merchant number. You can find your merchant number in your ePay administration in the menu Settings -> Payment system.
e-conomic automatically replaces [FakturaNr] and [DebitorNr] with the correct values when the invoice is sent.
Check the box Save by Body text, and e-conomic automatically fills in the text for your subsequent invoices.