Configuration in e-conomic
1. Configuration of the payment window
You can add your own logo and company information to the payment window. Go to Settings -> Payment window in your ePay administration to apply the changes.
2. Transaction fee
You decide whether or not your customers pay the transaction fee. Change your settings from the ePay administration in Settings -> Payment window.
3. Language
The payment window is displayed in the language which is used for the customer's browser. If the browser language is not supported by ePay, the payment window is displayed in English.
4. Automatic entry in daybook
You must use our standard payment window for this to work.
You can transfer a payment to your daybook in e-conomic. This means that when a customer has paid an invoice, an entry is automatically created in e-conomic.
You configure it from your ePay administration under Settings -> e-conomic integration.
Fill in your information in the fields:
- Account – the number of the account in which the payment is entered
- Daybook – In the drop down box, choose the daybook in which the payment is entered
- Account for fees – the number of the account for fee entries
- Daybook for fees – the number of the daybook for fee entries
- Contra account – the contra account of the entry, often your bank account
The numbers you enter are your account and daybook numbers from e-conomic. You choose the numbers yourself when creating the account or daybook.
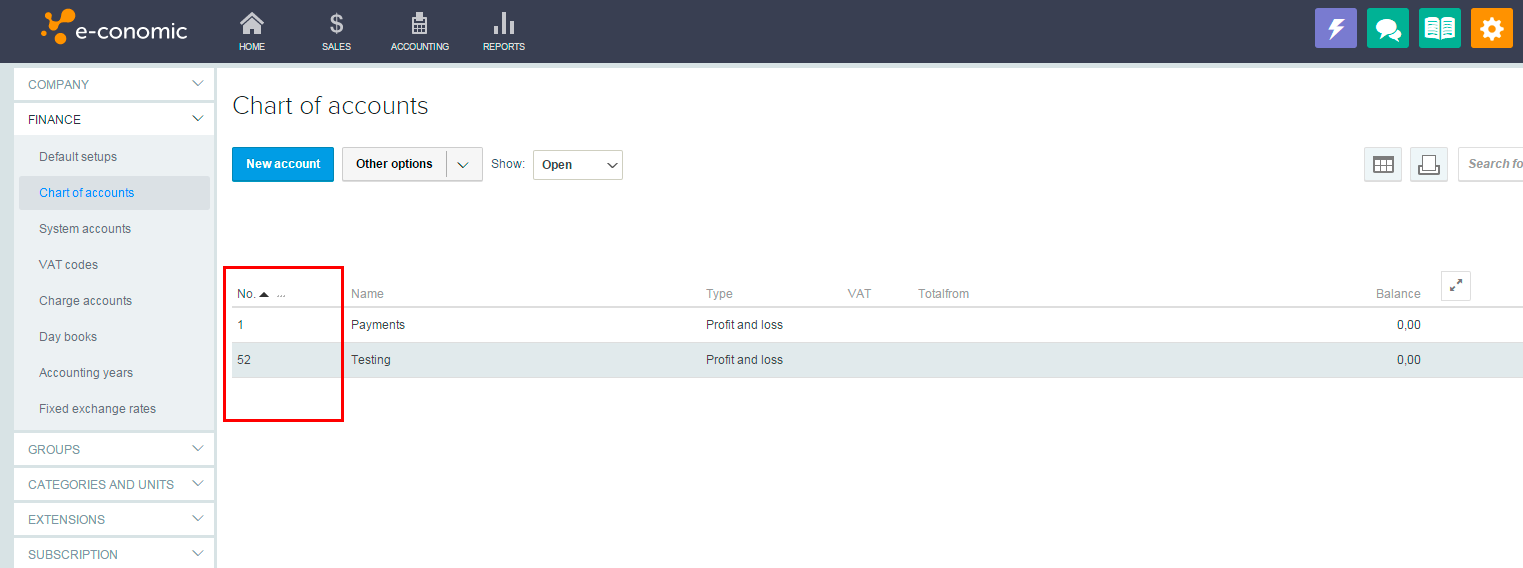
Find the numbers of your accounts here: Click on the gear icon in the upper right corner, and choose All settings. Go to Finance -> Chart of accounts in the left menu. The number of the account is located left of the name you gave the account.

If you don't want to use this function, simply leave the fields empty.
It may take up to half an hour from the payment is completed until the entry is created.